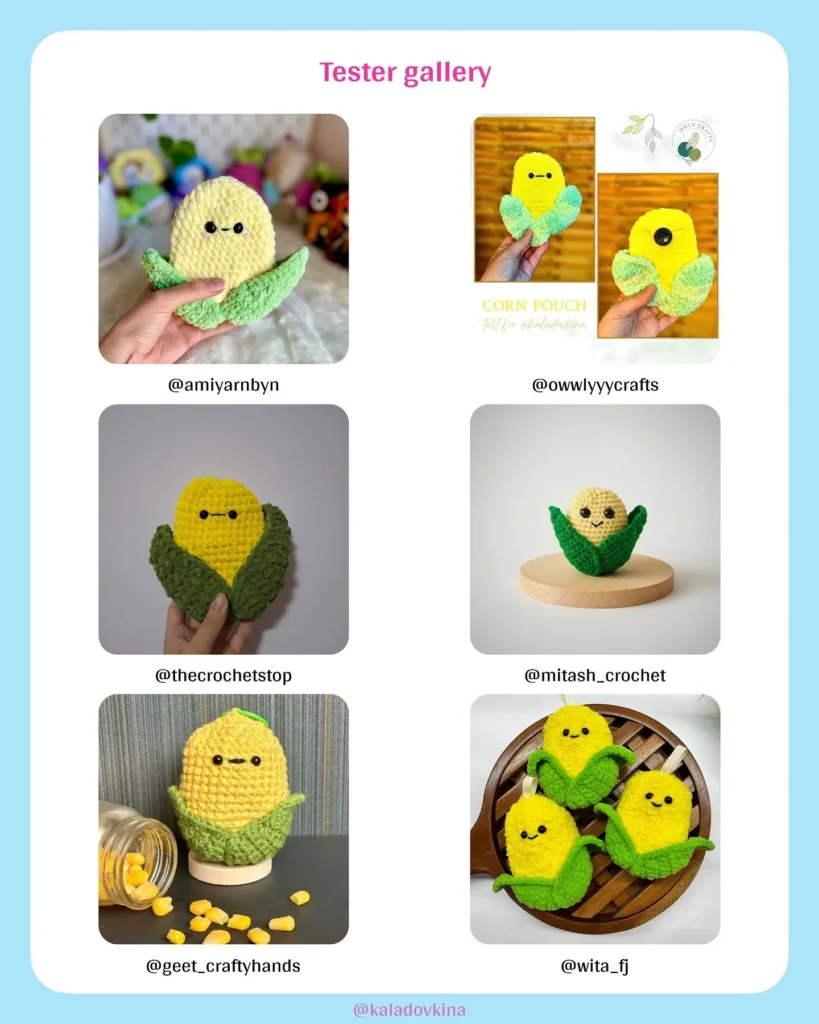
Crochet Cute Corn-Shaped Pouch for Beginners and Enthusiasts
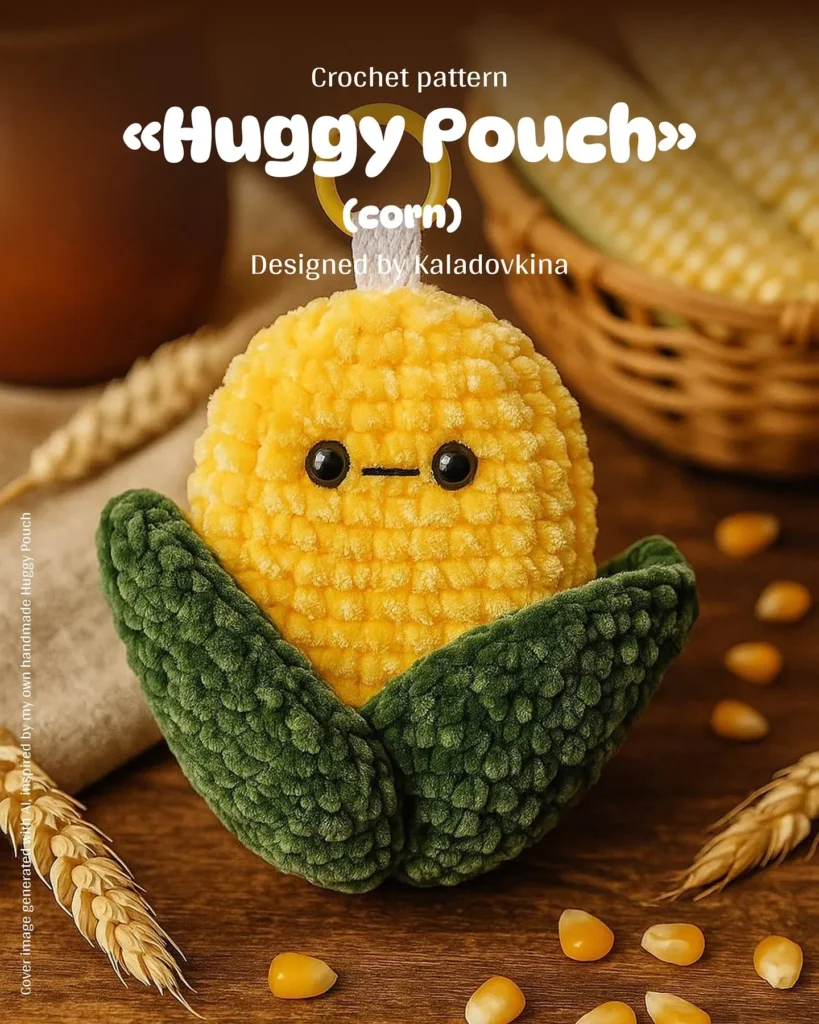
🌽 Huggy Pouch (Corn) Crochet Pattern
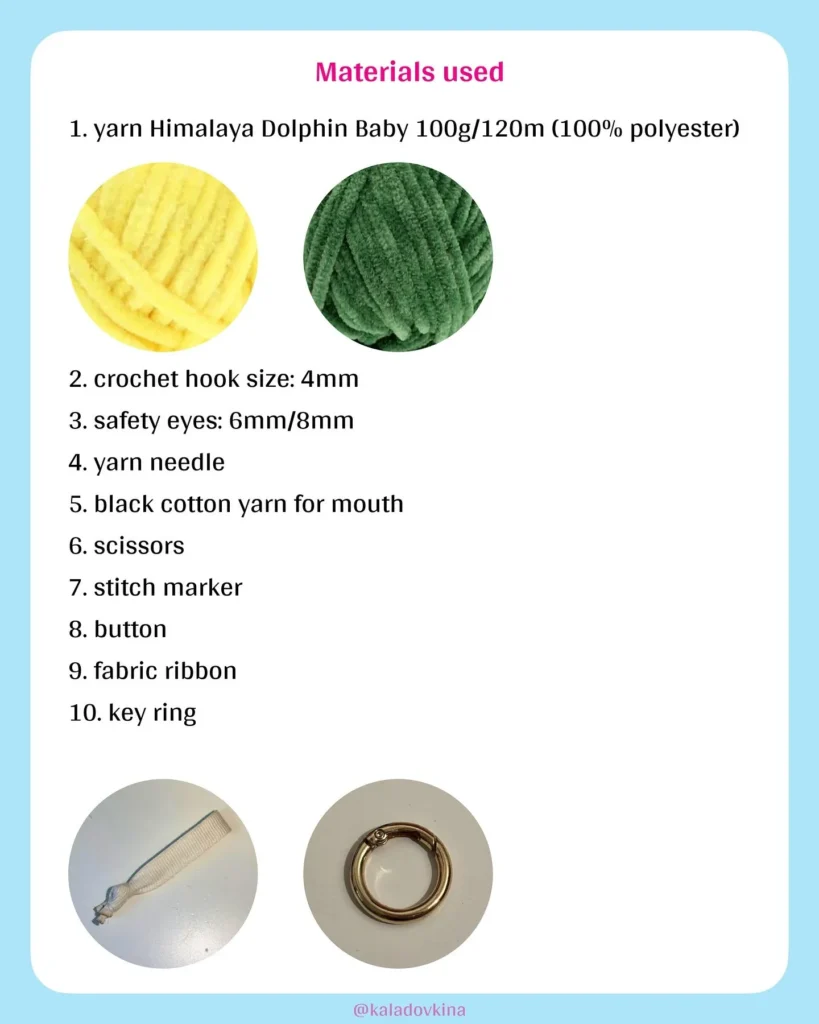
🧵 Materials Used
- Yarn: Himalaya Dolphin Baby 100g/120m (100% polyester)
- Yellow (for corn)
- Dark Green (for husk)
- Crochet Hook Size: 4mm
- Safety Eyes: 6mm or 8mm
- Yarn Needle
- Black cotton yarn for the mouth embroidery.
- Scissors
- Stitch Marker
- Button (for the closure)
- Fabric Ribbon (for the loop)
- Key Ring
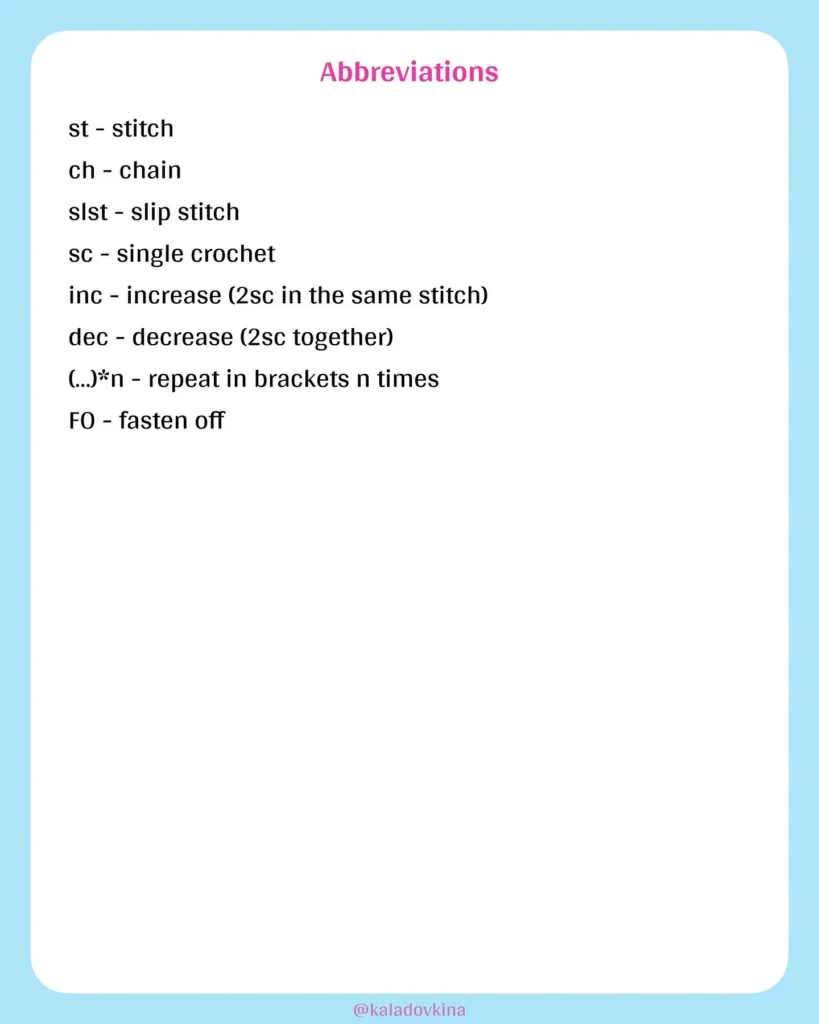
🔑 Abbreviations
| Abbreviation | Meaning |
| st | stitch |
| ch | chain |
| slst | slip stitch |
| sc | single crochet |
| inc | increase (2 sc in the same stitch) |
| dec | decrease (2 sc together) |
| (…) * n | repeat in brackets $n$ times |
| FO | fasten off |
📝 Pattern Outline & Assembly
This pattern involves creating a corn-shaped pouch (two flat yellow panels) and two green husks, which are assembled together with a closure.
I. Main Pouch Piece (Make 2 in Yellow)
- You will need to crochet the main corn kernel shape twice (Front and Back).
- The pattern is likely worked in short rounds to create a circular/oval shape, resulting in flat pieces.
- The specific Rnd/Row counts are missing.
II. Face Details (Front Piece)
- Insert the safety eyes onto the front panel.
- Use black cotton yarn and a yarn needle to embroider a straight horizontal line for the mouth.
III. Back Piece and Closure
- Sew the button onto the outside of the back panel.
- Create a loop using the crocheted yarn or the fabric ribbon and attach it to the top seam of the back panel to serve as the button loop closure.
IV. Husks (Make 2 in Dark Green)
- You will need two husk pieces, likely worked in rows or short rounds to form a leaf/husk shape.
- The specific Rnd/Row counts are missing.
V. Final Assembly
- Take the front piece (with face) and the back piece (with button).
- Insert the two green husks between the yellow panels so they curve around the bottom sides of the corn.
- Using single crochet or slip stitch, crochet all layers (front panel, husks, back panel) together along the edge, leaving the top open for the pouch opening.
- Attach the fabric ribbon loop and the key ring to the top center seam.
If you need the step-by-step stitch counts, please search for the pattern online or check the designer’s page (@kaladovkina), as the pages containing the crocheting instructions were not provided.
Would you like me to try to search for the full pattern, or wo